Hey friends, how are you? Did you see the new release from Rachelle Anne Miller that just came out yesterday? It’s a good one! The release features four different stamps (each containing multiple images / sentiments) that you can mix and match and/or resize to create birthday cards. I love these Creator releases, because the possibilities are endless.
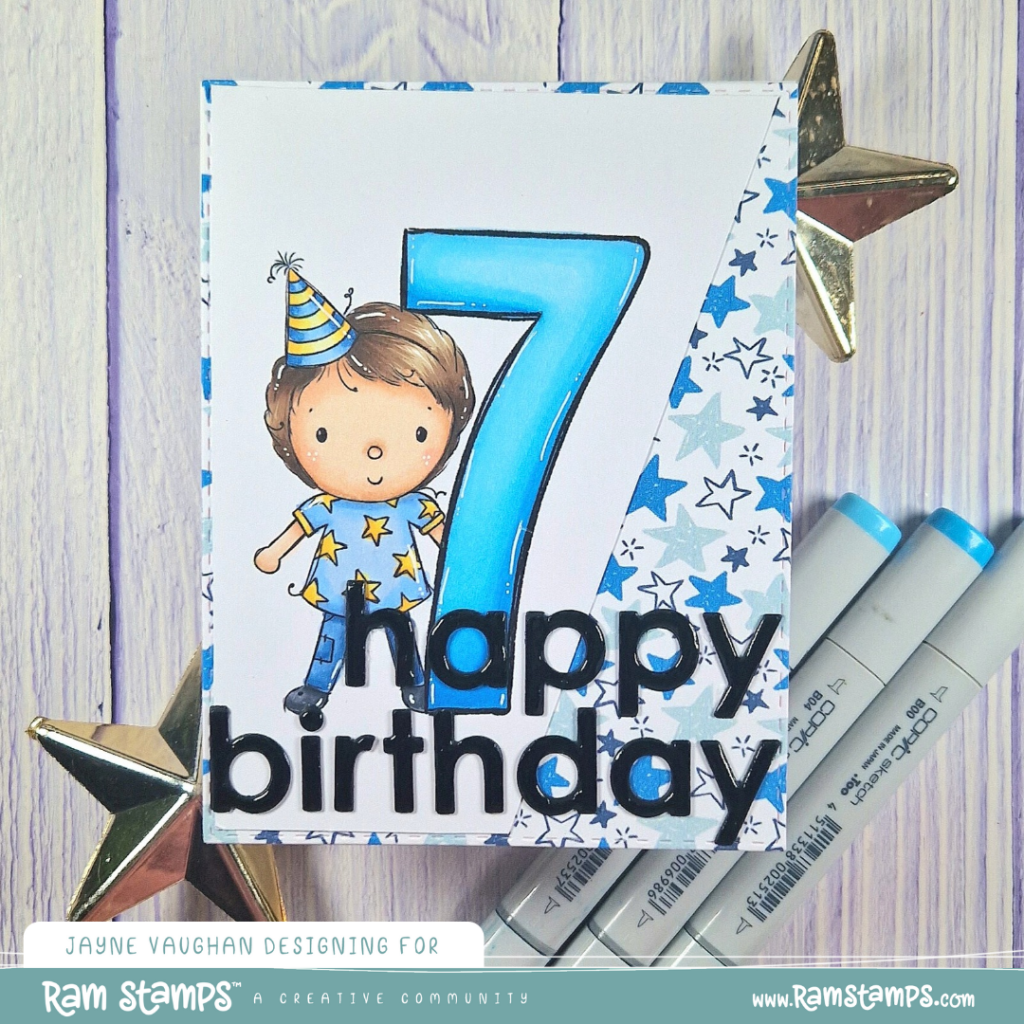
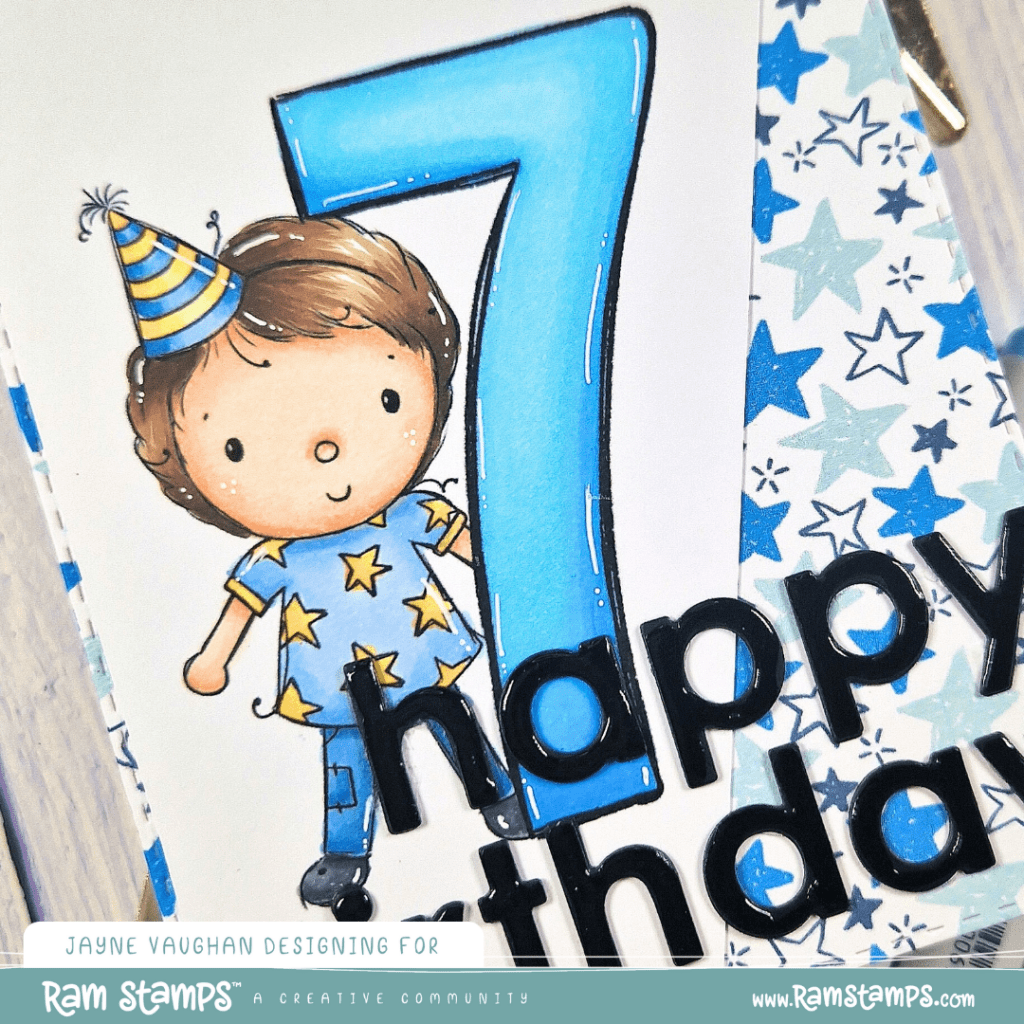
The first card I’ve made with the release is for my daughter’s best friend. They’ve been thick as thieves since they were born (I met his mum at antenatal classes!) and I can’t believe how old they now are! I used the “Happy Birthday Creator – Characters” stamp combined with the “Happy Birthday Creator – Numbers” stamp for my scene. I resized the “7” from the Numbers set to be as large as the boy character, and in Word I used the “bring to front” option, so it looked like my boy character was peeking out from behind the number.
I Copic-coloured my image with the following colours (by the way, ScrapbookPal have a discount code running for the next couple of days to get 6% off all orders or 11% off orders over $100 – including Copics! The code is SAVINGS):
Boy’s hair: E49, E47, E44
Boy’s skin: E13, E11, E000
Blue t-shirt: B34, B32, B91
Jeans: B37, B34, B32
Yellows: Y17, Y15, Y000
Shoes: C9, C7, C5
Number: B05, B04, B02, B01, B00
And of course, I finished with white gel pen accents!
For my card background, I printed out one of the co-ordinating digital papers from the release and die-cut an A2 panel from it using Pink & Main’s stitched rectangle dies. I then trimmed down my image to fit inside the stitched detailing, and cut it at an angle with my paper trimmer. I then affixed it to my card background with tape runner.

I decided to add an oversized sentiment, so I die cut the “happy birthday” sentiment from MFT stamps twice from black cardstock and stacked them together for dimension. I adhered them to the card with liquid glue (I’ll be sharing a little tip on how I did this to get the letters perfectly straight and evenly spaced on Instagram later this week). To finish, I added some Glossy Accents to the letters to give them some shine.
I hope you check out the release and the inspiration from the other DT members which will show you how versatile these little sets are! Thanks for checking in and I hope to see you here again soon xx

Leave a comment